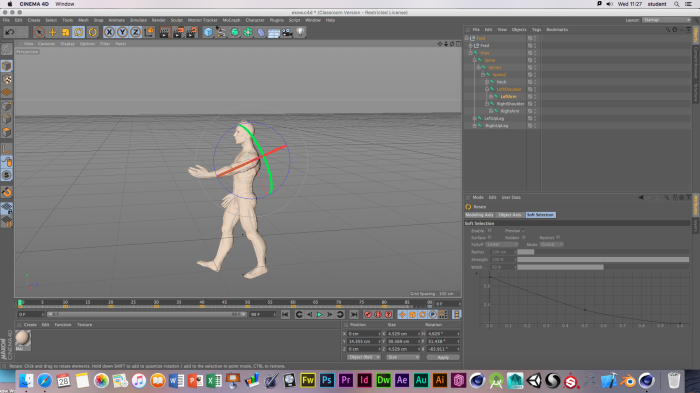
The video above is a simple rigged character, I was unable to access my old scene and animation to improve it as the file became corrupt, below is some screenshots that explain how I rigged and animated the character. I started off by grabbing a default character and using the front view to add in some joints with the joint tool, I then used the bind option to bind the joints to the model, this then allowed me to move certain aspects of the character individually; then I began to move some of the body parts around and keyframed each bit so it moves, then I stuck it into a standard landscape and added a physical sky, after this I simply chose the render settings and rendered out the animation.
I started by getting some of the old assets and placing them into one C4D file, the screenshot below is from the start of the animation process where I was positioning the gun box to pop through the ground.
I started by key framing the location of the box and moving it to where I wanted it to go, the screenshot below shows the moving pattern of the box and the gun while it is keyframed and moved through the house.
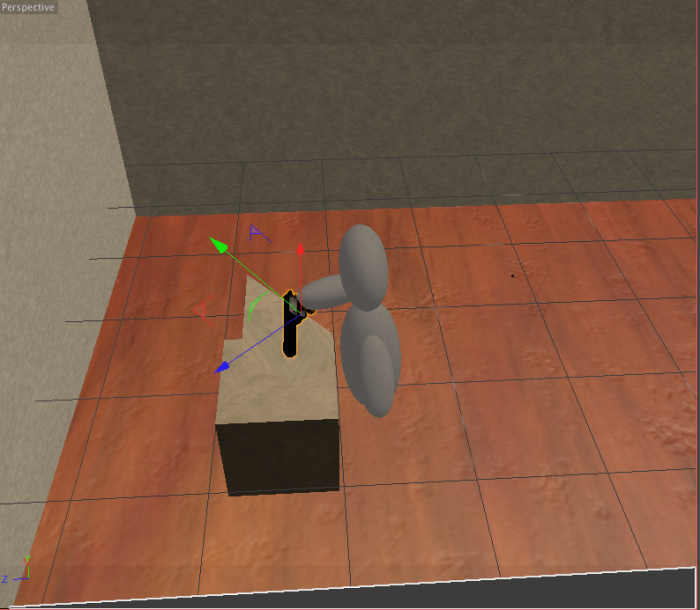
The next screenshot is showcasing the box moving up so that it holds the gun up for the character to grab during the cinematic.
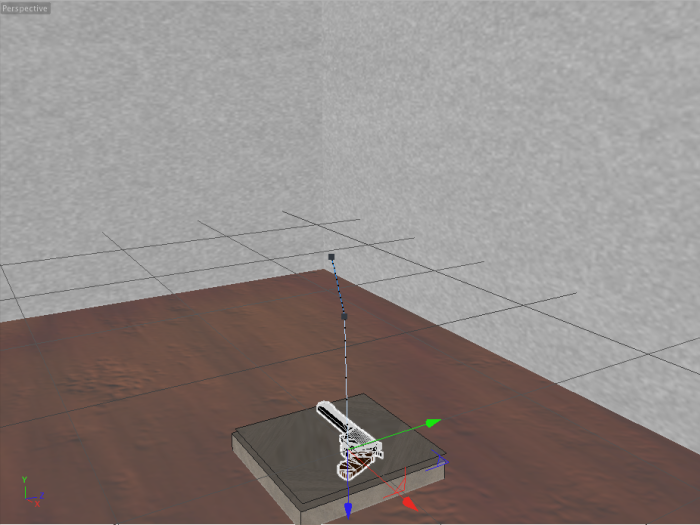
The screenshot below is the basic primitive room with a light on it the little black point in the middle is where the animation should take place and the gun box should come up through the ground for the character to grab.
The screenshot below shows the process I went through to create the character I started with cubes and put them into a subsurface division it is supposed to be a basic robot and I will eventually add some blue glowing effects to it so it looks like it is hovering or being propelled forward.
The picture below is towards the end of the animation production where the character was being animated and keyframes into position, the character will enter the room then grab the gun and zoom back off, this is the character flying in for the first time.
Below is how it will look when the character grabs the gun, in the final version I’m planning to have a little blue spark coming from his hand so it looks as if the robot is magnetising the gun to it’s hand.
The slideshow is just a rough show of how the final product will look.
This slideshow requires JavaScript.
Below is a quick video on how I did the rigging on the robot character.
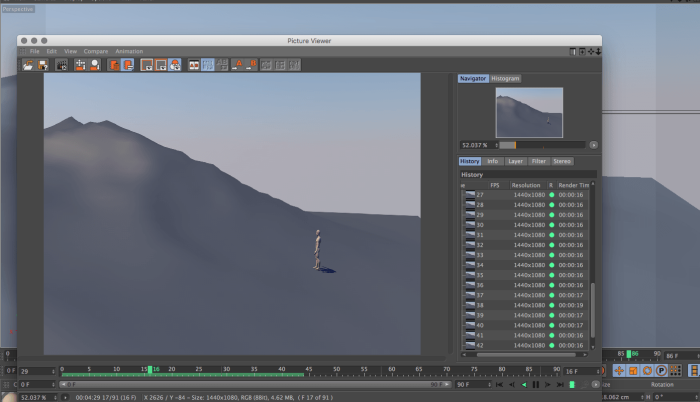
Above is a screenshot of my project rendering in one of 2 views.
This is one of the views that will be used it shows the gun rising from the ground and the main character picking it up and flying back off to war.
Evaluation
I started the original idea as a space ranger fighting scene but soon ran into some issues involving polygon count and render time, this meant that I had to scrap the idea and start again, however due to the time in which I noticed the issue it meant that the new idea had to be done quickly and still following the space ranger idea. Originally I planned to feature a bar fight scene and have a gun pop up from a secret box under the floor which the main character would then grab and start fighting with, this has to be scrapped as I had got close to completing and was too far into the project to look back through everything I had previously done to try and find which version was ok to go off from, instead I settled with a scene which could be used as a prologue to the original idea, so I kept the gun rising from the ground scene and came up with a slightly new story, the main character is now grabbing the gun from their home meteor and is getting prepared to go into battle. The new animation idea had to be rendered and made from scratch (only keeping a few models like the character and gun) in the space of about 2-3 weeks, the planning could’ve been done bit more efficiently and I could’ve set out certain times in college to do certain aspects of the animation. I also had a slight issue with coming up with an idea to begin with so I settled with the first theme that came into my head and worked up from there, I wouldn’t say I have much knowledge of Cinema 4D but what I do know is more than other software such as; Blender or Maya, however Cinema 4D still proved to be a somewhat reliable piece of software that allowed me to produce and finish my animation.
During the process time I was very limited in what I could make as the issues I came across seemed to be very specific to me; therefore I wasn’t able to get help from tutors or the internet and had to find out the answer alone, i was also limited by the fact that I currently don’t have a working computer at home and had to create all of my assets in college time which was a massive pain as my USB stopped working in the last few weeks and I had to put up with switching between Dropbox and Google Drive.
The final product didn’t look as good as I had hoped because ambient occlusion and global illumination caused each frame to render incredibly slowly and would’ve caused me to be unable to complete the project in time. I originally wanted the main character to have little glowing rings that would signify that those areas are magnetic in order for the animation to make sense, but because of the effects not working I had to settle with a slight light going from the rings, also I originally wanted to use a sketch and toon effect to make the colours look softer and polished off professionally, this idea also had to be scrapped because of render times and the capabilities of the macs being pushed too far.
All together though the final product suits the target audience as the gun signifies violence and action aimed at older teens more towards the adult age range, and the robot flying and space setting continues the space ranger original idea and still shows the audience that this game/cinematic is about space fighting and wars in space themed places. Furthermore I enquired with a few of my peers what they thought about my cinematic, I had lots of mixed reviews as I asked them to be brutally honest and find any and all issues with the finished product, according to them the product “had bad optimisation but good quality rigging and smooth animations,” when asked about the idea itself they said it was “too simplistic” and “could’ve been more in-depth, however it was executed well and you did a good job of trying to implement the original idea into the new one.” As you can see the cinematic had mixed reviews and did had some issues that could’ve been ironed out if given more tim, but also had some good things too; therefore I would say that it would be good to send it out into a focus group of people to test out if I was correct with the target audience and to find any other improvements that could be completed.
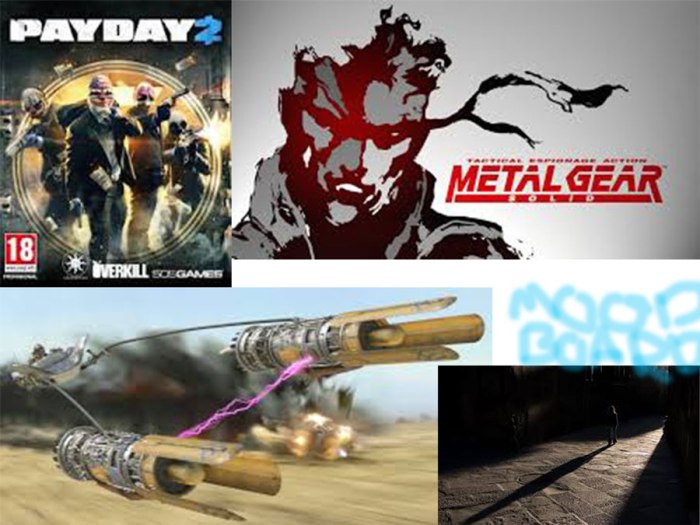
I will be aiming to produce the game on mobile devices, therefore I will need to make sure that the assets for the game are low poly, this allows the game to be accessible to multiple devices. The game will hopefully feature a space theme with some sic-fi/fantasy, it will feature some driving mechanics and lots of fighting/shooting mechanics. The game will be played from a first person perspective and will feature a HeadsUp Display and a minimap to help players find the objective easier. It will have an aspect of open world in it to enable the player to have freedom over their own choices and make the game more immersive. My target audience will mainly be teens and a few you adults as this is the age that most people play video games at, also the game will feature violence etc therefore will not be allowed to market to people under the age of 12. There shouldn’t be any ethical constraints but sounds and textures may be restricted depending on whether they are copyrighted or not. The current ones I am using are from the Cinema 4D built-in texture manager. Below is my moodpboard I used payday as inspiration for the bank robbing aspect and star wars pod racers for the racing and escaping aspect. The metal gear and shadow image basically represent stealth and how the whole idea of the game is to be sneaky.
Synopsis. The game is set in space, it will involve a young space ranger who catches criminals and is very good at it. He turns rogue one day after an incident and it makes him realise the system is corrupt. He becomes a professional bank robber and sets up heists with his crew in space. Upgrade ships and run from the cops after robbing millions from banks.
Objective. This design will offer an action packed intense game with a deep story that involves a dark twist, it will have an essence of mystery and has a thriller feel to it. It will grip the audience and draw them in to continue playing, the gameplay will be immersive and will build a lot of tension to discover the truth. It will be compatible on devices to stick to the client brief and will feature some in app purchases etc.
Target Audience
The target audience is mainly for adults or teens as it features guns and violence, this may restrict my marketing as the audience will be slightly more restricted and may lower sales etc
The chart above represents the ages and genders of gamers and shows how 29% of the market may be affected by the age rating on the game, that is an extra 29% of gamers that could have purchased more copies of the game, as you can see the gender split is quite neutral so the game should appeal to both men and women to achieve the greatest efficiency when selling copies of the game.
Structure/Constraints. The initial assets and structures will be built using Cinema 4D, this is a software that I am familiar with and will allow me to create detailed looking assets to please the client. I will most likely get the textures from royalty free websites or by simply making them myself if I have the time.
Visual Design. The designs will be fairly cartoon looking in a cel-shaded style, sharp edges and soft colours, this will make it appeal to everyone due to the nice flowing colours, this can be achieved with Cinema 4D’s texturing system and the “sketch-and-toon” render effect. It will have lots of space ships and buildings hovering on planets that can be explored with the click of a button.
Look and Feel. The textures will be fairly basic to give the impression of high detail will also allowing it to run on multiple devices with a low poly count, the effect will be added afterwards to improve how the game looks, it will run fairly smoothly on most devices and shouldn’t drain too much battery.
Technical Specifications. The assets file size shouldn’t be any bigger than 200mb depending on what the specific asset is. I will be using cel-shaded styles to allow for low poly count assets that still achieve great detail.
Legal and Ethical I will be able to avoid copyright issues by only using homemade assets or some occasional royalty free ones. I highly doubt this game will offend anyone as it doesn’t feature any religious aspect, it is purely a racing/ action adventure game
Delivery.
I intend to have created at least the following:
2 different spaceships
2 character models
2 NPCs
plenty of miscellaneous objects i.e bins, doors, lights etc.
I started of by acquiring a reference image and splining around it, this method is quick and simple and allowed me to create each individual part with it’s own movement system, this video below is an example of one of the models moving, the little loader trigger moves back when pulled and clicks forward when fired to shoot the bullet out of the barrel. The purpose of the video is to showcase progress in modelling the gun.
The next video below is the production of the gun and how I animated the trigger, this is just a rough one as it isn’t really textured unlike the one above. I have now finished the asset so I shall upload a final render video soon.
3D can be found in many types of media and non-media types like TV, film, games and advertisements but it can also be used by palaeontologists by creating a 3D reconstruction of a dinosaur using fossils and other evidence of the size and shape, and archaeologists can use 3D in the same way except they can reconstruct buildings from old eras using items they have dug up.
3D software that I know are blender, Unity and cinema 4D I have only personally worked with cinema 4D and Unity a bit but the advantages of using blender is that it can be used effectively for experienced designers and it is usable to animators as it has the capabilities to make animations however the interface seems quite complex so it may not appeal to less able designers who are new to the business, Unity isn’t completely useful for designing things for industry so it isn’t classed as an industry standard software for designing but it is good for developing and scripting games, Cinema 4D is the software I have been using to create certain items and it is excellent for designing models and items such as that but it is quite expensive as it is seen as industry standard software but it allows you to mould the shapes into any way you like and creating lighting in a professional way.
This image is intended for the video game industry as it is an image from the game Assassin’s Creed Revelations.
Geometric theory is how basic shapes are created, first you start with a point (vertex) but joining to points together creates an edge and joining a third point to the shape creates a face or by having 3 touching edges minimum creates a face too. In this image you can see that lots of shapes have been used and moulded to create this stunning looking background in front of the character so the creator of this part of the game has used a geometric theory to create the points on top of the towers in the distance.
A world of this size requires quite a lot of rendering so this game is slightly pre rendered during the opening cut scene, however when you start the game and properly start playing the game renders in real-time as it is most efficient for modern games also it helps to keep the polygon count high but without making the game slow down and crash lots of times.
To create this dinosaur model the creator has use many techniques like hypernurbs to round off the corners of the T-rex and make it seem more realistic and give it a professional finish, there are lots of primitive shapes that have been used here too as you can see in the first image the shapes are very clear as the vertices are more defined due to the model not being rounded.
The most common viewing modes when making 3D models are front, back and right as they are the best angles to get a good view on how to mould the primitive shapes, the tool that is more commonly used is the extrusion tool as it helps to bring parts of a shape from the inside, out to form a shape, I am currently planning on making car models, therefore I will need to use stretch and knife tools to create a box shape then to finish the final product I will have to use hypernurbs to creat a rounded off effect to the edges of the car model, The bevel tool can also be used in this modelling process by allowing me to add more segments to the edges of the shape creating a more accurate way of rounding off the edges and making them look more professional.
The dinosaur was possibly created using the main views which include perspective, front, top and right these were used to make all the primitive shapes join together and align perfectly it also helps make the final product look professional as you can look at it from an angle that is more block-like and accurate.
There are lots of types of 3D lighting such as spot light, natural light and artificial light in this image you can see the shading under the T-rex so the creator has used some natural lighting possibly as it would come from above and that’s where the light is.
The lighting seems to cover the whole area so it is a big area light also the shadows suggest the light isn’t just in one spot but there isn’t any other effects to it as it doesn’t seem to be a rendered final version.
Material is used to mainly make an object seem more realistic whereas texture is simply just wrapped around the object for look rather than physical properties.
The T-rex image has lots of shading in it around the bottom of the body, head and tail, also the T-rex hasn’t had any material editing as it isn’t a finished product it also hasn’t got any textures on it.
Direct X is a system that is used for making 3D scenes from the simple primitive shapes and is used and created by Microsoft, open gl is the same sort of thing as they both work with the graphics card to create the scene that is required for the game or animation.
Lots of rendering techniques have gone into this image such as global illumination to make the scene look like its outside, when the model was created it was probably preview rendered as that is the most accurate way of seeing if your final product will look any good. Furthermore, the way the image has been made makes it easier for it be compressed down and reopened and still look good at very small resolutions like I have made it into, this sort of work makes it look professional and could be used for media purposes like adverts and tv.


 ting in a professional way.


